

Portrait in Colour Pencil – Combining the Elements
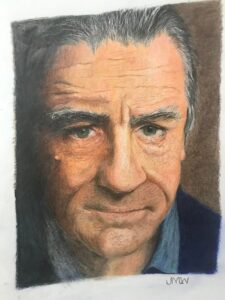
Now it was time to bring the studies on eyes, lips, hair and skin together to complete a portrait.
My chosen portrait in colour pencil was Robert de Niro.
Robert has a beautifully weathered look and life experience etched on his face.
The First Stage of the Portrait
I had all the new skills under my belt but even so, this was a daunting challenge. I decided that I would use the grid method to transfer the image because I could make it a little larger that way. Using the grid method also allows me to constantly practise drawing and sketching out free hand. Next, I laid down some base light colours for the skin. This allowed me to use pencil strokes paying careful attention to skin direction, underlying muscle and areas of highlights.
Once, this map was drawn out I began by working on the eye.
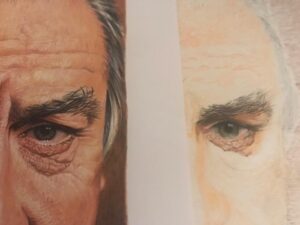
You can see that the colours used for the basic sketch are very light. The darkest colour used so far at this stage is a very dark grey. I’m using Canson 1557 paper.
I am not trying to get an exact copy, this is not the purpose of the exercise. What I am really concentrating on is combining all the skills learnt so far. How to draw the eye, how to treat the skin around the eye. Also, paying attention to bone structure and underlying muscles and how the skin appeared over this.
The Second Stage
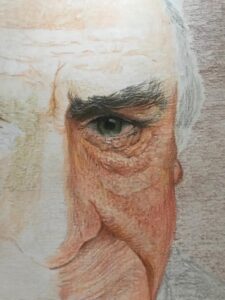
The next stage was to add some deeper hues and work down the cheek and side of the nose. As you can see I have mapped out the direction of the skin, where the highlights are on the nose and where the shadows are in the skin folds. When it came to texture, I paid attention to where the pores where most apparent and where they disappeared from view. You will see I also roughly greyed out the background. For me, this makes it less distracting. It may just be my own mind, but it helps me feel there is not a massive challenge ahead. I suppose it is a bit like a writer with a blank page in front of them, I can sometimes overwhelm myself. Working with coloured pencil involves hours of work. By having a greyed out background all the paper is covered and gives me a feeling of progress (it works for me!).
The Portrait Begins to Emerge
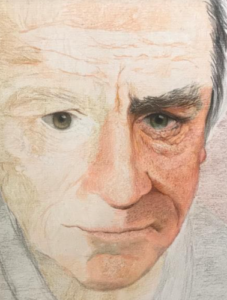
I think this is the stage where you either give up or forge ahead. As I positioned the mouth and committed to the shape of the nose there was no going back. Continuing with the layers of colour, adding lightest first and building up, the portrait began to emerge. Had I been using pencil, I would probably have been in the final stages by now. Graphite and charcoal being my first love when it comes to creating art. Having never done a portrait in colour pencil before, my progress was very measured and slow.
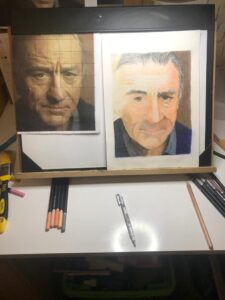
I worked on a small desk easel, using a desk blotter as a cushion under the paper as I did not want the grain of the wood to come through. Behind me is a small, flexible lamp to give me plenty of light so I can see the details. At 54, my eyesight is not what it was so I need good light and sometimes use a magnifying glass to see small details like pores and facial hairs etc.
The finished Result
And my certification: