

Mountains Rivers and Trees Oh My
This painting of mountains, a river and trees began life as another Colorbyfeliks tutorial.
Mountains
I quickly laid out the sky, then the mountains. Adding water and the trees was a breeze and then I sat back to assess the work so far.
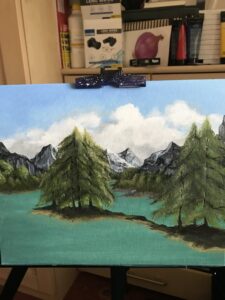
Can you spot the problem?
Suddenly it seemed that I had magical water. An upper level and a lower level in the distance. A rookie mistake and I was frustrated because I had spent a lot of time getting the mountains and sky the way I wanted them to look.
It is at this point that you have to decide whether you want to continue or start again.
I decided I would just have to make the painting my own and it would, as every picture before it, be a valuable learning experience.
And during the misery of lockdown, it provided my partner Andy with something to laugh at (but try not to). In the end it caused a lot of hilarity and we discussed whether or not it could be saved.
I looked at the picture and visualised what it could be instead and decided that I would have water flowing at different speeds in different areas.
I would also insert a feature to the foreground to accentuate the upper level of water.
After much swearing and a plentiful amount of coffee and procrastination, then more procrastination. I picked up my brushes.
Mountains and Molehills
I decided that I would have some rapids on the background water to the right and inserted a rocky outcrop where the water could crash a little.
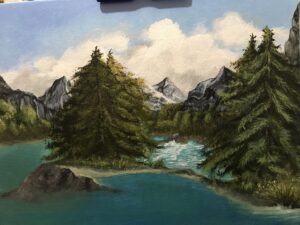 The sky seemed too different a hue of blue so I lightened it a little.
Adding a few minor details to the background I then began to work on the conifers in the foreground.
To separate the pooling water, I added the rock feature and some greens to give the water some more depth.
I felt like the picture had more balance with the slower moving water to the left. Now I just had to demonstrate that the water needed to drop a level on the left.
The Final Result
The final stage of painting is always the most enjoyable. It is all about adding those tiny details to make it more realistic. I managed to save it and make it my own piece in the process. Maybe it was time to tackle a picture of my own design…
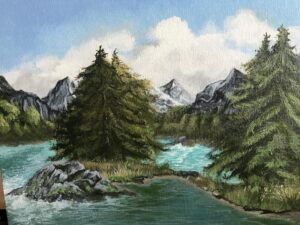
To see more of my acrylic paintings see my earlier blog Learning to Use Acrylic Paint
When I began this blog I decided it would be a truly honest diary of my journey. All the good, the bad and the ugly!
I hope that if someone is on their own art journey, they will see that sometimes a project goes wrong. Not due to lack of skill, or experience, but just having an off day can throw your ‘eye’.
Stop, take a breath and remember, if you are painting in acrylic you can just paint over and begin a new layer.